Experimenting with Instagram Video
- Holli Kalina
- Oct 16, 2024
- 4 min read
Updated: Nov 18, 2024
Studio Day is a short video that I created with the intention of cross-posting to my Instagram and Facebook Page social media feeds. The shoot was scheduled across two days when I would be in the studio photographing portraits for Southampton City Reflections. I shot multiple clips throughout the day and asked my colleague to film me. I combined the video clips with digital stills, music, and text to create a timeline narrative.
I used my research into social media videos to inform my editing. After viewing the work of other creators who were publishing videos around the central theme of photography I deduced that popular work was short and delivered its message quickly. By using multiple clips of one to two seconds duration the viewer is more likely to remain engaged. Music is an essential element, of these short-duration videos where information delivery is restricted to short snippets. This approach varies from that of, say, YouTube videos which typically last longer including an intro and outro, and main content where music may not be prevalent. YouTube videos tend to be more informative and cover a subject in greater depth.
Things that I wanted to avoid, based upon my preferences when researching this form of communication included: Slow voiceovers, overly enthusiastic or upbeat dialogue, out-of-tune music tracks, phrases such as “tips and tricks” unnecessary pauses at the beginning (see Millennial Pause) or during the delivery.
I recorded all of the clips using an iPhone 15 Pro as the video capabilities of the phone would be perfectly suited to social media publication. I shot all clips in 19:9 portrait orientation as this would suit a mobile phone aspect ratio during playback and is specifically suitable for both Instagram and Facebook video posts (Wilson, 2024). I did not use an external microphone as I did not intend to use live audio. I used a frame rate of 30fps and a resolution of 720p, choosing a lower resolution to save storage space and speed up file transfer between devices when editing.
For editing, I utilised Adobe Premier Rush. The functionality of Premier Rush was adequate for my needs, providing basic video editing functionality in what appears to be a cut-down version of Adobe Premier Pro. Being part of the Adobe suite of products there is a familiarity about the interface despite the purpose being very different. The presentation of video and sound elements as layers channels felt similar to editing layers in Photoshop. I found myself able to navigate my way around the application without resorting to hours of training videos and a manual. I am sure there is more to the package than I have used, but I will no doubt learn more with continued use.
During the edit, I applied text layers, gif files, music, still images, and transitions between some of the clips. The steps I followed were aligned with the recommendations provided by Adobe (Adobe, n.d.) These included:
· Import and edit down each clip to key moments
· Arrange the clips in the correct order to support the narrative
· Insert still the images
· Edit the entire sequence for the timing to ensure an upbeat ambiance
· Apply transitions
· Select and add an appropriate music track (this part took the longest amount of time of all the steps)
Whilst editing I decided not to include a voiceover because the sequencing and the text at the start provided sufficient narrative. I intend to include a voiceover or live voice during my next video.

Reflection
This video was more upbeat than my first attempt. My decision not to speak over the images was deliberate as I am still struggling to see and hear myself on video. The use of an amusing clip at the beginning of the video improves the hook at the beginning which has resulted in a significant increase in views from my first post, more than doubling the interactions to 230+.
The pace of this video was an improvement upon my first, and the music, which had a higher number of beats per minute, helped to emphasise a feeling of quickness.
Editing in Adobe Premier Rush on a large iMac screen was a far better experience than using the DJI app on my phone. To use clips in Premier Rush I needed to download them from the iCloud-based photos application to a physical hard drive, Premiere Rush has no option to load clips directly from Photos, which is a bit of a disappointment, but it turned out that this was a good introduction to using its professional video editing cousin, Premiere Pro.
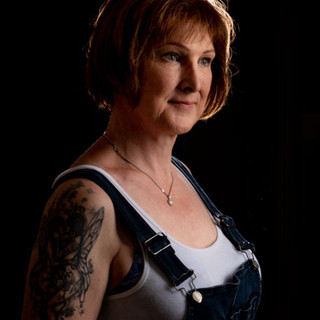
I like the final video. I think that it describes both me and my practice fairly well. If someone were interested in my photography business this video would be seen as a positive insight into how I operate. The background to the subjects is clearly a professional studio and the model appears relaxed as if she is enjoying the experience. I found that I enjoyed editing this video far more than previously, possibly because I was not self-conscious about my appearance in it.
ADOBE, n.d. Make It [Viewed 14/10/2024]. Available from: https://makeitcenter.adobe.com/nz/blog/edit-videos-for-social-media.html
SHIREY, T., 2024. 33 Creative Social Media Campaign Ideas for This Year [viewed Oct 15, 2024]. Available from: https://www.webfx.com/blog/social-media/33-creative-social-media-campaign-ideas/
WILSON. D., 2024, The Social Media Creative Creature [Viewed 14/10/2024]. Available from: https://books.google.co.uk/books?hl=en&lr=&id=xu0IEQAAQBAJ&oi=fnd&pg=PT7&dq=how+to+create+a+video+for+social+media+using+adobe+premier+rush&ots=xd_75FqygA&sig=RP6-fvENI5QzxtPZBkHci88_TMo&redir_esc=y#v=onepage&q&f=false

Comments